Classroom Audio
Introduction
Each classroom will have its own set of audio devices to assist with presenting videos, projecting your voice, hosting virtual classes, and getting students involved!Speakers
Around the campus you might find speakers on the instructor station, in the ceiling, or beside the projector screen.Microphones
Used for projecting your voice across larger lecture halls or into your computer for Zoom meetings.Speakers
Basic Room
Volume Controls
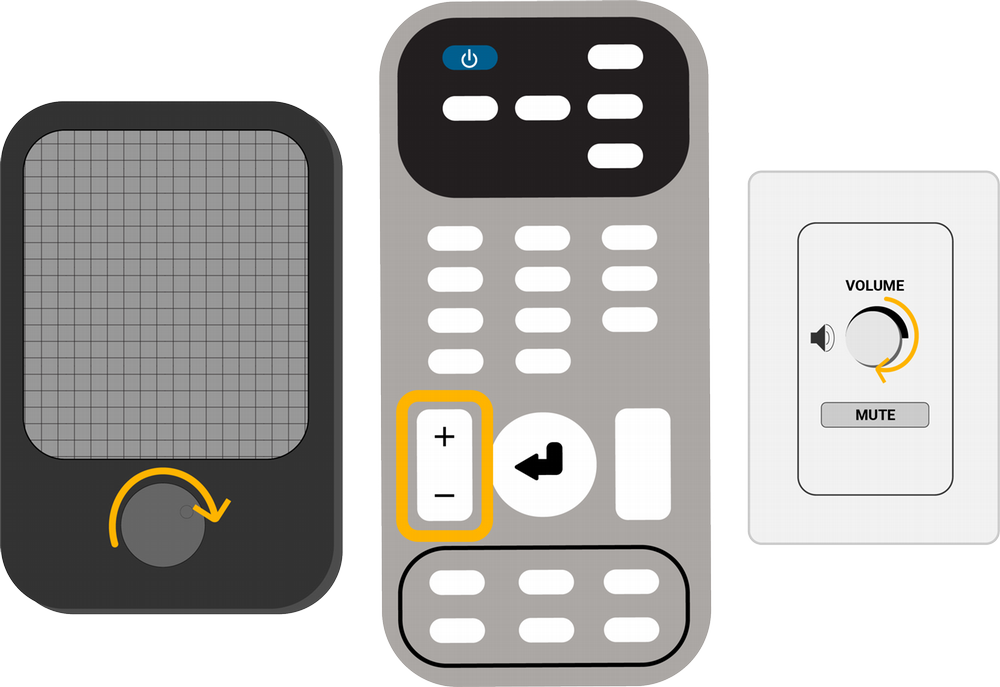
In Basic rooms, these devices will either be mounted directly to the desktop or built into things like computer monitors or to the projector, and their volume can either be adjusted directly on the speakers themselves, the projector remote, a wall panel with a volume knob, or from the windows audio menu.
Standard and HyFlex
Volume Controls
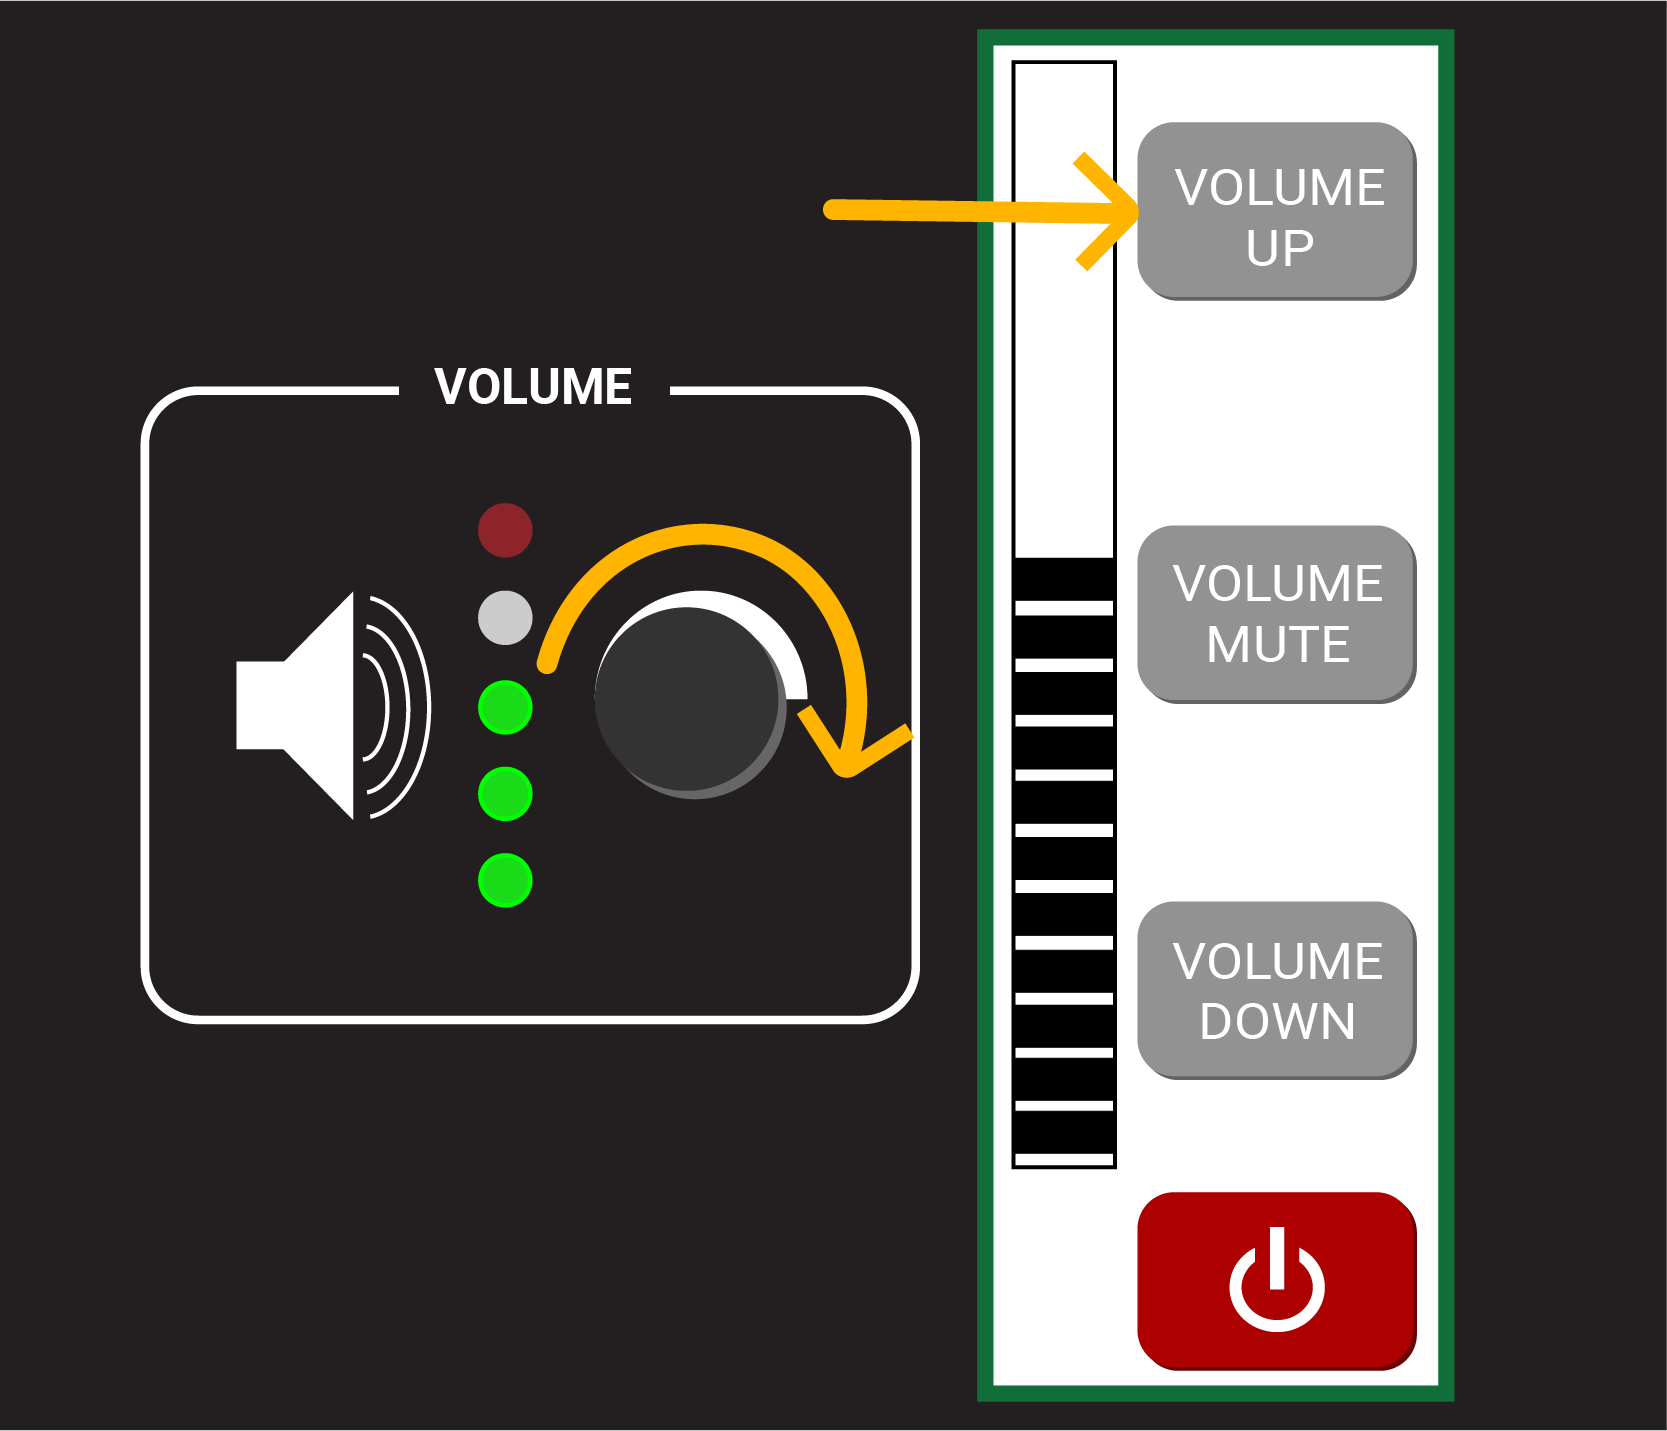
Standard and Hyflex room audio is controlled directly from the room controller via the volume knob, or the touch buttons on the right side.
Speakers in Zoom
When using any of these devices through Zoom, joining the meeting from the instructor station computer and clicking “Join Zoom with Computer Audio” will be all you need to do.
However, some rooms may have multiple different output sources, and someone may have changed this prior to your arrival in a classroom.
You’ll want to look for the following devices:
| Speakers You May Want to Use | Device Names in Zoom | Alternative Names |
|---|---|---|
| Ceiling or Wall-Mounted Speakers | Echo Cancelling Speakerphone (DMP Plus USB #1) | Classroom Speakers |
| USB Desktop Mounted Speakers | Realtek USB | Classroom Speakers |
| Projector or Display Speakers | Dell or Extron HDMI Audio | Classroom Speakers |
Microphones and Catchbox
Adjusting Microphone Volume
From a Touch Panel
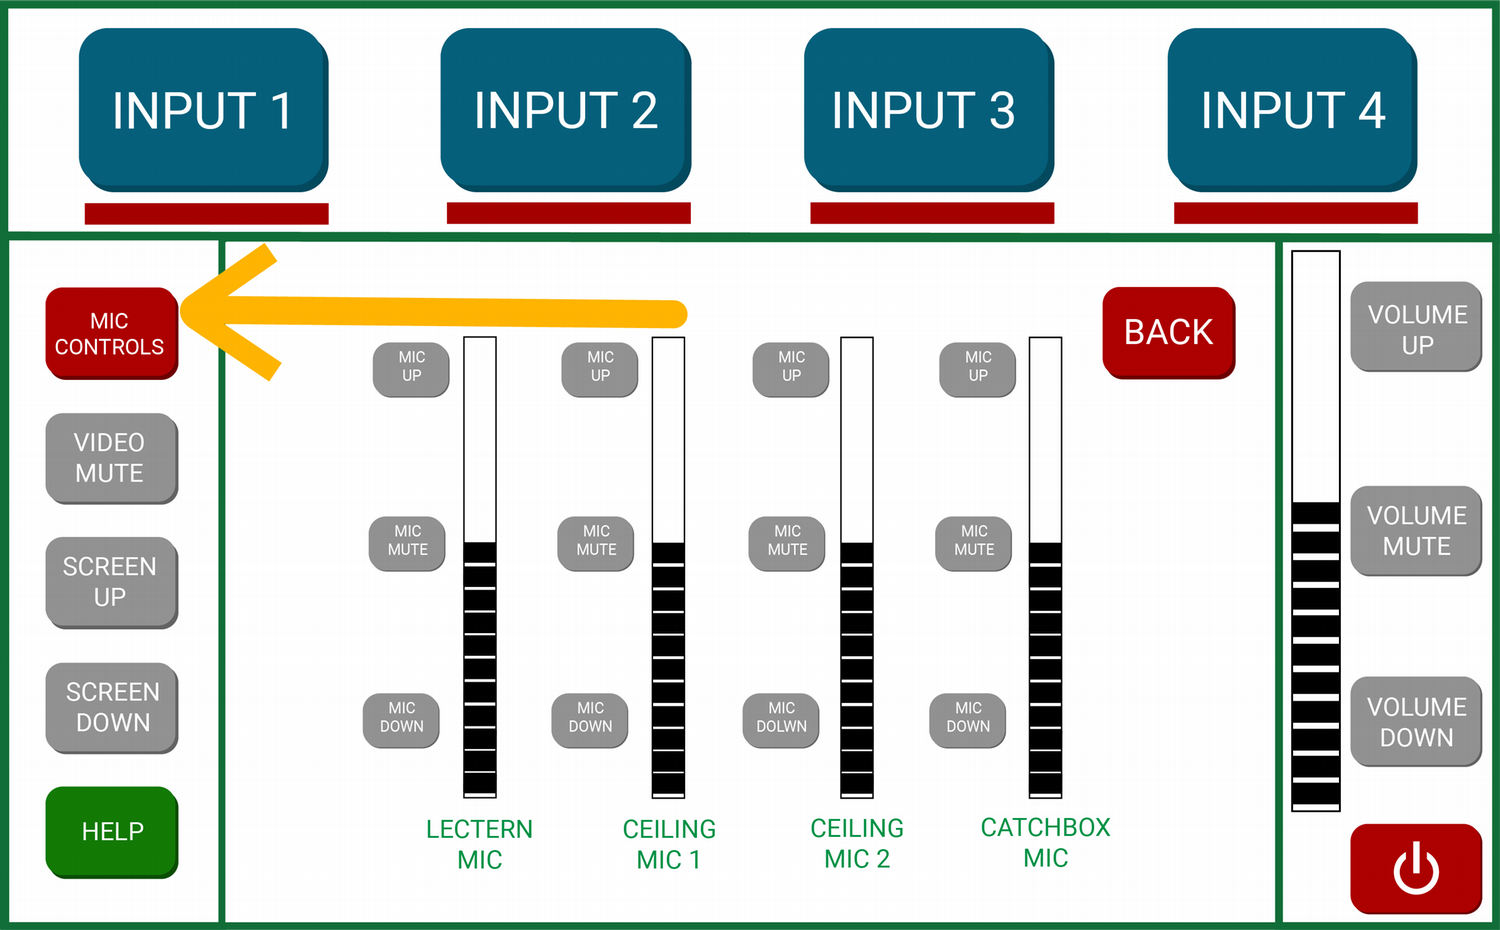
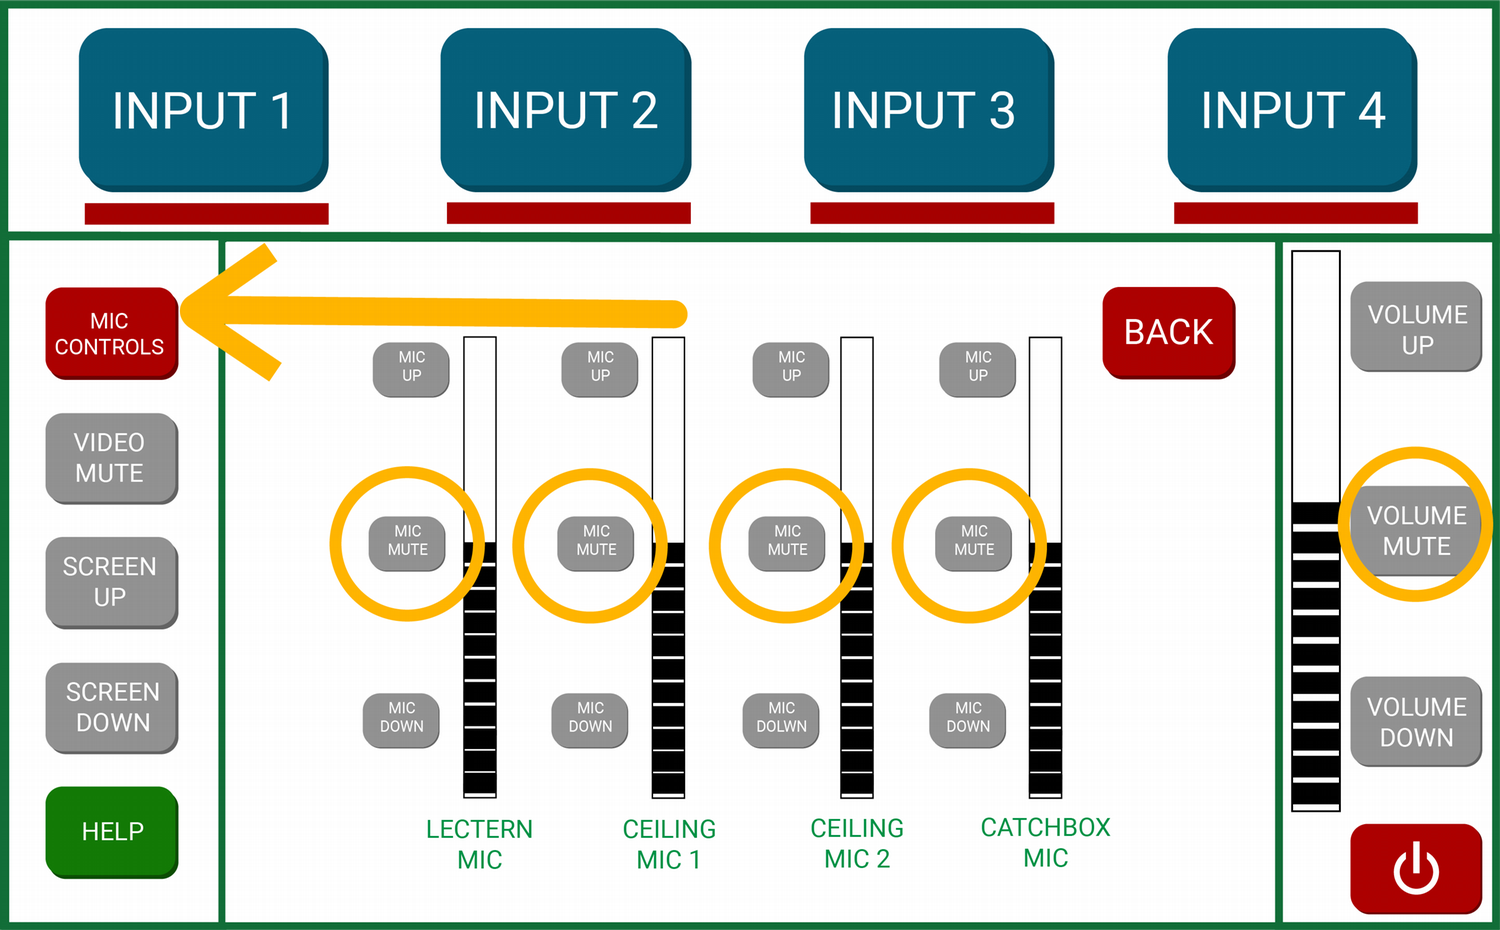
Volume and Mute adjustments will vary depending on how advanced a particular classroom is, but if these settings are available to you, you will find them on a touch panel controller under the Mic Controls menu.
Here you can individually adjust microphone volumes and mute to suit your needs.
The Catchbox
A Throwable Foam Cube
Another type of microphone you’ll commonly find around the campus is the Catchbox. It can be found in rooms as either the dedicated microphone set, or an addition to existing room installed ones.
This microphone is a throwable foam cube that is designed to take some abuse and make collaborative discussions a more interactive experience.
The Catchbox will also come with a dedicated lapel microphone that can be worn by the main instructor while the cube is tossed around the classroom.
These mics are automatically muted when they are placed back on their charging stands.

Microphones in Zoom
When using any of these devices through Zoom, joining the meeting from the instructor station computer and clicking “Join Zoom with Computer Audio” will be all you need to do.
However, some rooms may have multiple different output sources, and someone may have changed this prior to your arrival in a classroom.
You’ll want to look for the following devices:
| Microphone You May Want to Use | Device Names in Zoom | Alternative Names |
|---|---|---|
| Desktop or Ceiling-Mounted Microphones | Echo Cancelling Speakerphone (DMP Plus USB #1) | Classroom Microphones |
| Catchbox | Echo Cancelling Speakerphone or Catchbox (USB) | Catchbox Microphone |
| Webcam | Logitech BRIO | Webcam Microphone |
Troubleshooting Help
- Make sure the correct output device is selected on the instructor station computer settings.
- Often it is Echo Cancelling Speakerphone or Extron HDMI Audio for Standard and HyFlex rooms
- Basic rooms will either use USB Audio or HDMI Audio
- Check the Volume using the room controller

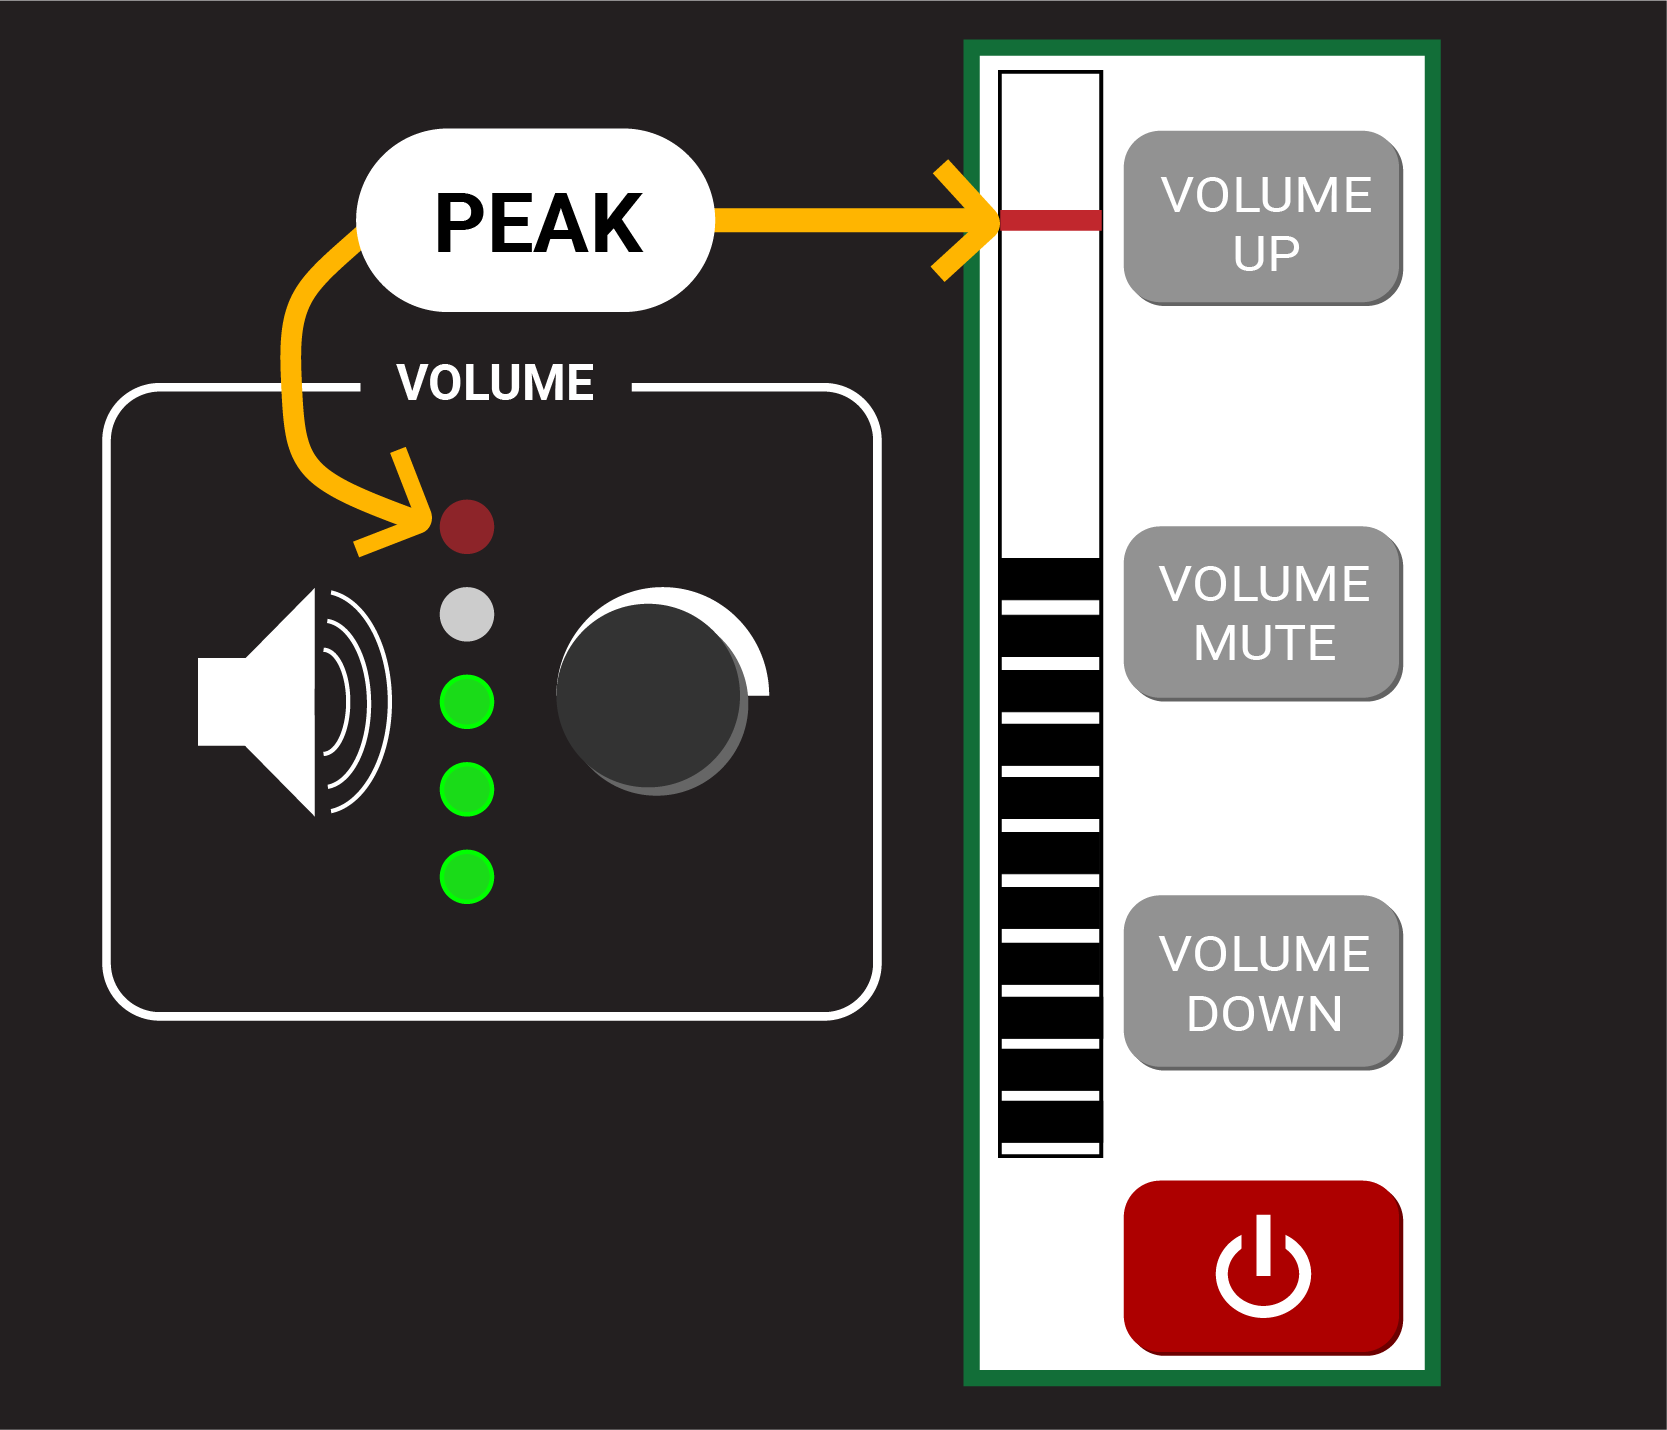
- Make sure the volume on your speakers is not maxed out using the room controller
- Make sure any unused microphones are muted using the room controller
- Some room microphones will have a physical mute button at their base, make sure it is not illuminated in red.
- Most other microphone mute is controlled from the touch panel

- All rooms have differing audio setups, so selecting the correct device will come down to a few factors:
- Rooms with built-in ceiling or instructor station microphones:
- Select Echo Cancelling Speakerphone from Zooms audio settings
- Rooms with Catchbox Microphones:
- If this microphone is connected directly to the computer you will select Catchbox
- If this microphone is connected to the room system you will select Echo Cancelling Speakerphone
- Rooms with built-in ceiling or instructor station microphones:
- This most commonly happens when multiple mics are enabled and are picking up audio from the room speakers causing feedback
- If your room has a Catchbox, make sure it is plugged in/placed correctly on the charging stand

- If your room has ceiling and instructor station microphones, go into the microphone settings on the touch panel and mute any microphones you are not using

- If your room has a Catchbox, make sure it is plugged in/placed correctly on the charging stand