MS Forms Tutorial
Introduction
The Campus is moving away from FormStack and adapting MS Forms as a new forms platform.
Guidelines for moving to FormStack
Please review your forms and please make sure to follow the bellow guidelines:
- If your form has any level 1 data, please DO NOT USE MS Forms, you will need to use
OnBase for the form, you can contact Jason Bokai. If you need any further information
about what is level 1 Data please refer to the following link (PDF) - If your form does require an E-signature, please DO NOT USE MS Forms, you will need to
use Adobe Sign for that form, unless you can replace the signature with an acknowledge
box then you can proceed with MS Forms.
Steps of creating a new form in MS Forms
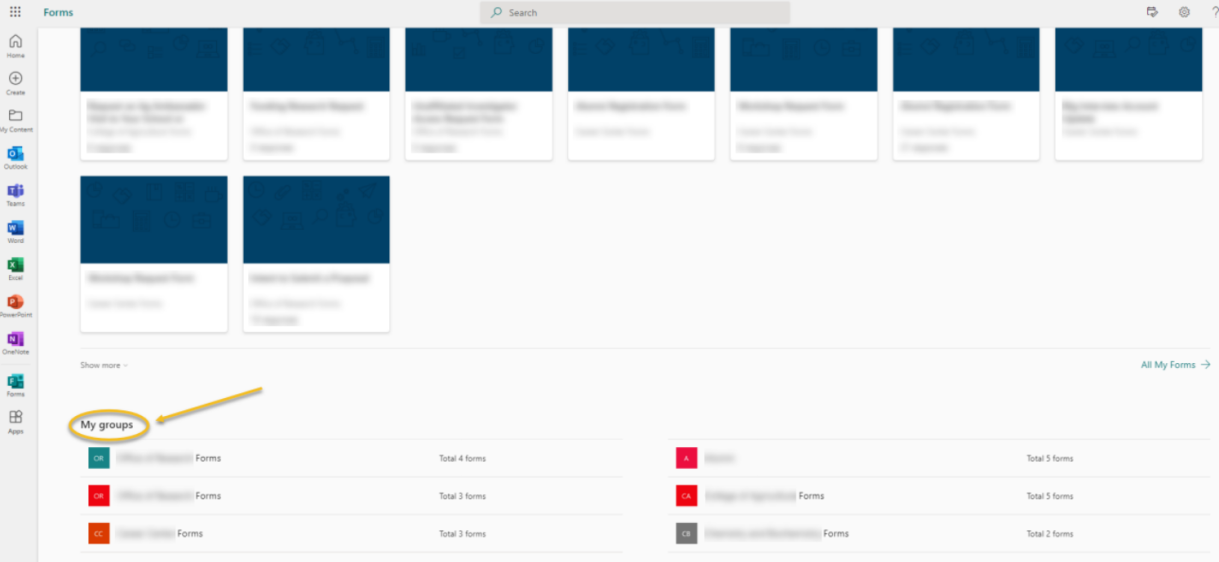
Please make sure that you are following these steps hence they are very crucial, once you log in to MS Form you have to be aware that you will be using your CPP credentials and this will lead you to view your personal Office 365 space, you will have to be sure that you are selecting the appropriate group account that you are creating the form for, otherwise the form and its all consecutive submissions will be stored in your personal office 365 space.
Steps of Creating a New Form in MS Forms
1. Log in to MS Forms
• Loging to MS forms.
• on the dash board please scroll down to the bottom of the page until you see My groups
• Make sure to select the appropriate group that you want to create a form for.
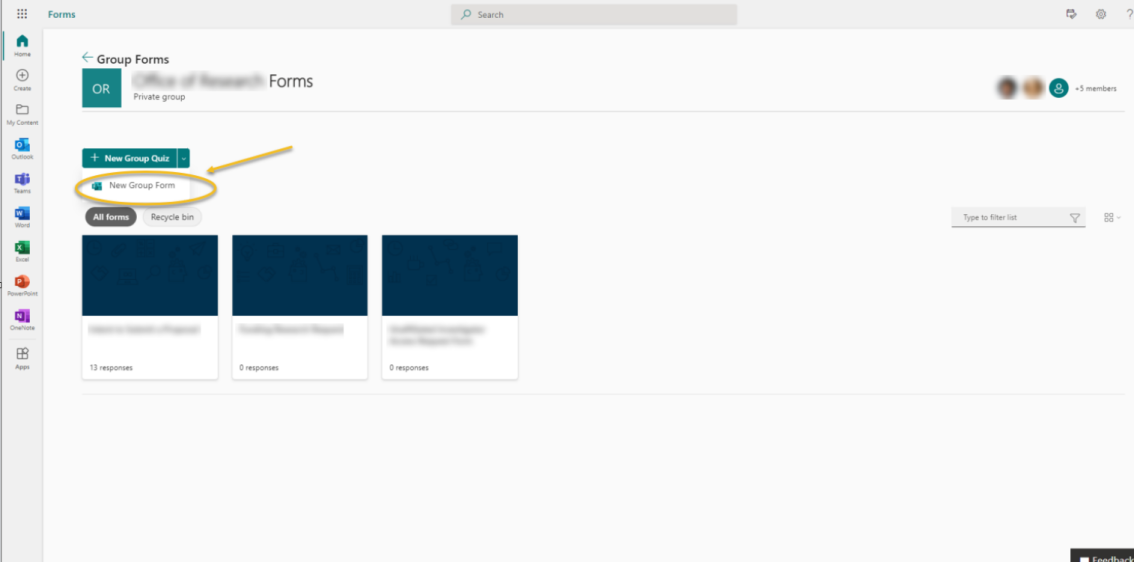
Creating a new form
Once you are on the group form dashboard, select New Group Form from the dropdown
menu
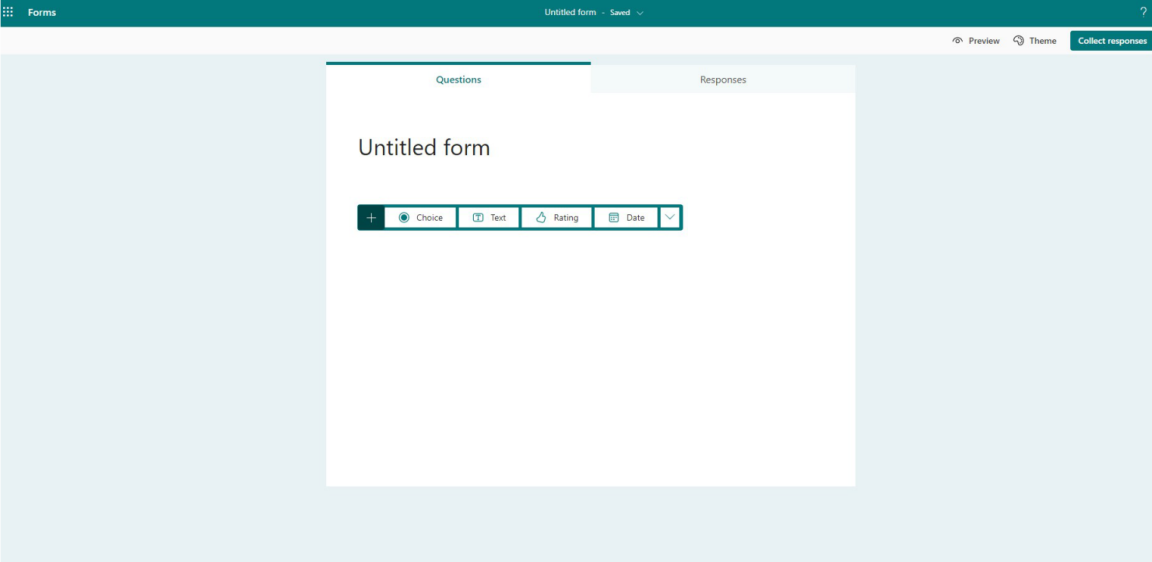
1. Select Add new to add a new question to your form.
2. Choose what kind of question you want to add, such as Choice, Text, Rating,
or Date question types. Select More question types for Ranking, Likert, File upload,
or Net Promoter Score® question types. To organize sections for your questions,
select Section.
- Tip: You can also format your text. Highlight a word or words in your title or questions,
and then choose any of the following: Bold (keyboard shortcut - CTRL/
Cmd+B), Italic (keyboard shortcut - CTRL/Cmd+I), Underline (keyboard shortcut - CTRL/
Cmd+U), Font color, Font size, Numbering, or Bullets - Important: If you delete a question, it will be permanently deleted along with any
response data that's been collected for it. Learn more
Before you get started, it's a good idea to make sure all of your questions are created.
When you're ready to add branching, follow these steps:
1. Go to the question for which you want to add branching. Select More settings for
question, and then choose Add branching.
Note: If you add sections to your form, you can also add branching to a section. On the section you want to branch, select More settings for section, and then choose Add branching.
2. On the Branching options page, select the drop-down list next to the question you want
to branch.
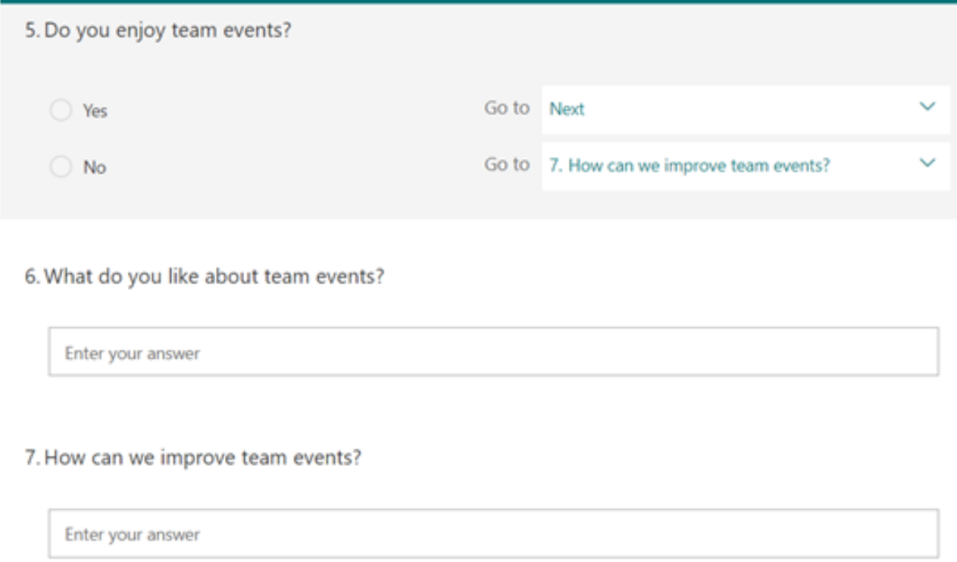
3. Select the question that you want to branch to. In this example, if a
respondent answers Yes to question #5, you would direct them to go on to the next
question (#6). However, if the respondent answers No to the question #5, you would have
them branch, or skip, to question #7
Notes: You can only branch to a consecutive question and not a preceding one. For example, if you have seven questions in your form and want to add branching to question 4, it can only branch to questions 5, 6, 7, or end of form. In the same example, question 5 can only branch to questions 6, 7, or end of form. If you try to branch to a preceding question, such as question 4 branching to question 2, it will break the experience for your respondent by skipping questions 5 through 7 and
taking them directly to the end of the form with the Submit button. To prevent this, only
branch to a consecutive question.
4. To insert additional branches to your survey or quiz, repeat steps 2 and 3. If you want a
particular question assigned as the final one in the survey or quiz, select the drop-down
list next to that question, and then select End of the form
5. If you want to completely reset your form and remove branching, select More options,
and then choose Reset.
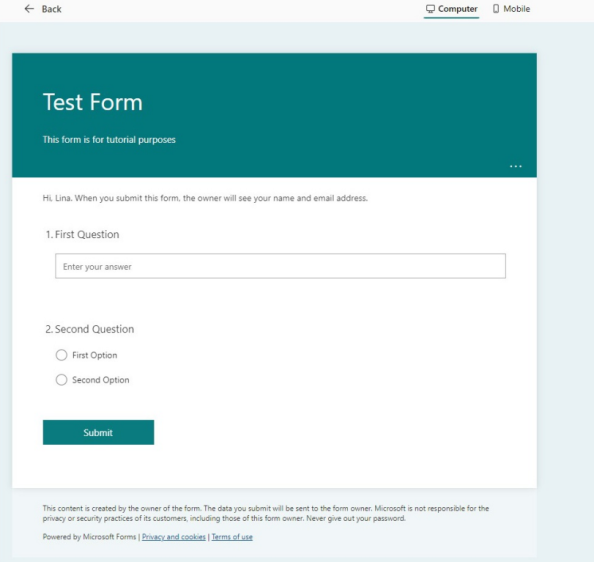
1. On a computer, select Preview to see how your form will look. On a mobile device
select to see how your form will look.
2. To test out your form, answer the questions in Preview mode, and then select Submit.
3. To keep editing your form, select Back.
Share forms with other/ embed form to cascade page
Choose who you want to respond to your form
In the Share pane under Send and collect responses, select the drop-down list and
choose from whom you want to collect responses.
- Anyone can respond - Anyone inside or outside of your organization can submit
responses to your form or quiz. - Only people in my organization can respond - Only people within your organization,
signed in with a work or school account, can submit responses to your form or quiz. - Specific people in my organization can respond - Only people or groups in your
organization that you specify can respond to your form.
Copy the the link that is shown in the box, once the link is copied you can start to share that link in cascade:
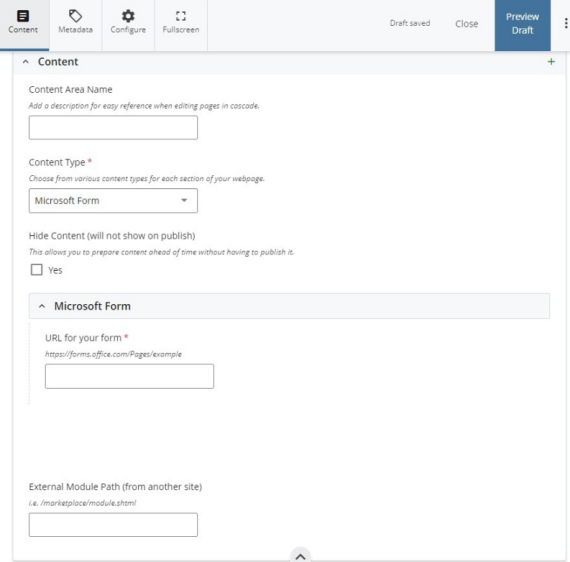
- Open cascade and choose the site that you want to share the form in.
- Create a content page and choose Microsoft Form for the content type.
- In the "URL for your form" paste the URL from MS Form.
- Publish the content page and the form is ready to accept submissions.
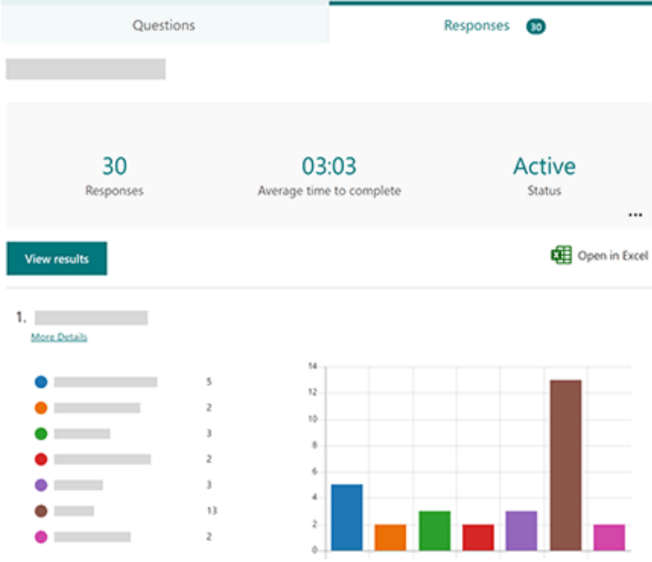
After you create your form, adjust its settings, and share your form with others, it’s time
to view the results. Open the form for which you want to review the results, and then
select the Responses tab.
- Select View results to see individual details for each responder, such as time it took to
complete your form and the option(s) selected. - To easily view all of the response data for your form in an Excel workbook, select Open in
Excel. - Select the More Details link to see the name of each responder and their answers for
each question.